How to Install VMware ESXi Type 1 Hypervisor
Bare-metal (type 1) hypervisors have a big leg-up on their type 2 counterparts. With the hypervisor installed directly on top of hardware, there are many benefits, but the biggest is that you don’t have the performance impact or security risks of a host OS. It’s the standard in data centers and enterprise environments.
Among the leading hypervisors is VMware’s ESXi. This product is geared towards larger enterprise environments. In this guide, I’ll detail how I installed it on my server and how you can do the same.
Downloading the ISO
The first thing you need to do is download the ISO file from the VMware website. Depending on the version of ESXi you need, you may need to select a different file from the drop-down menu.
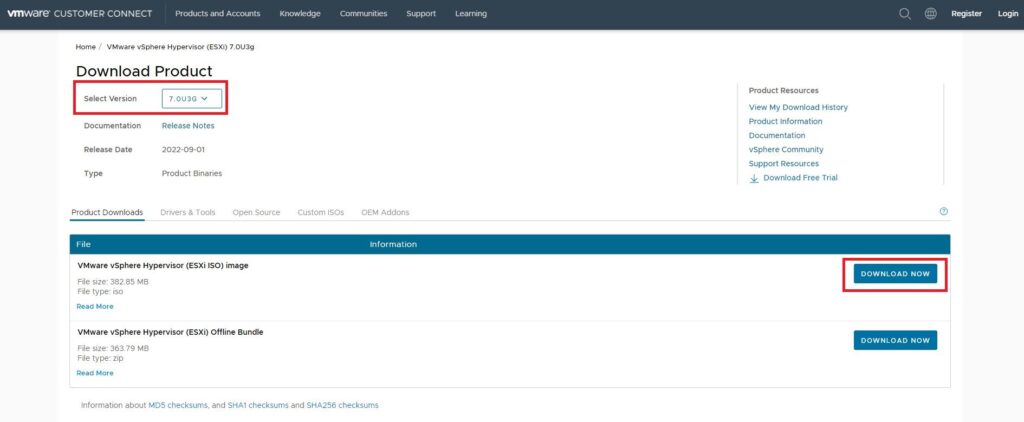
In this example, I’ll download version 7.0U3G. You’ll need a VMware account to download the file.
Create bootable installation media
Once you have the ISO file downloaded, you’ll need to create bootable installation media. Doing so is identical to installing a regular operating system. This means that if a system starts and finds installation media, it will boot to that installer instead of an installed OS. The easiest way is to use a USB drive.
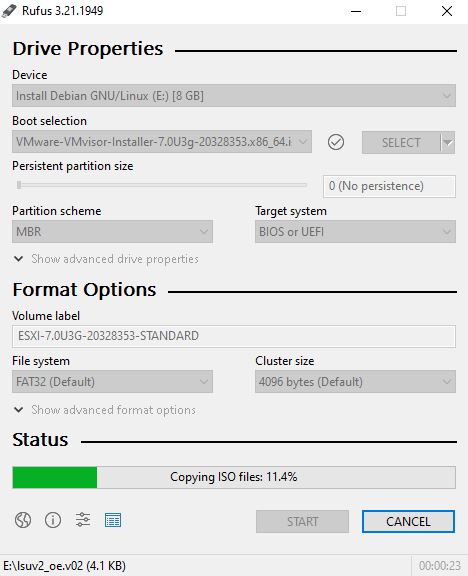
To do this, I used a tool called Rufus. Rufus is an easy tool to copy installation media to a USB drive and make it bootable.
To use it:
- Plug in your USB drive. Ensure there are no important files on it, because everything on the drive will be deleted.
- Start Rufus.
- In the Rufus interface, select the name of your USB drive (in this case, mine was called “Install Debian GNU/Linux” from a previous, unrelated Debian install) in the Device menu.
- In Boot selection, select the ISO from VMware.
- Start! The rest of the settings are fine.
- Once complete, you can unplug the USB drive and close Rufus.
Installing ESXi
With a bootable USB drive containing the ISO file, you’re ready to install ESXi.
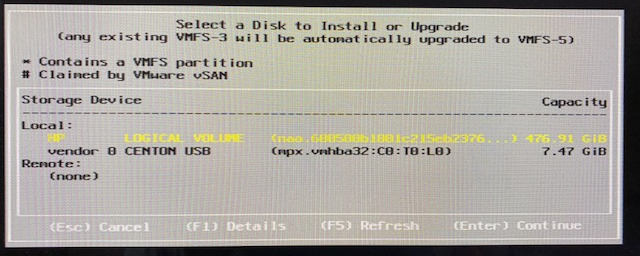
Plug the USB drive into your powered-down server. Turn the server on. Depending on your BIOS, you may be asked which media to boot with. If this is the case, select the one on the USB drive. In any case, you’ll be welcomed into the ESXi installation with the screen below.
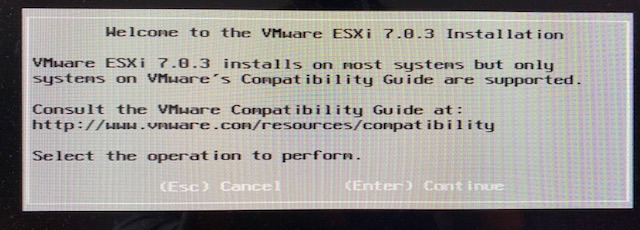
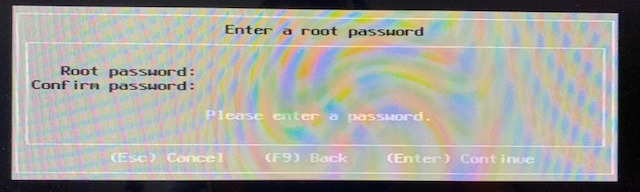
Follow the on-screen prompts. The process is identical to simply installing Linux.
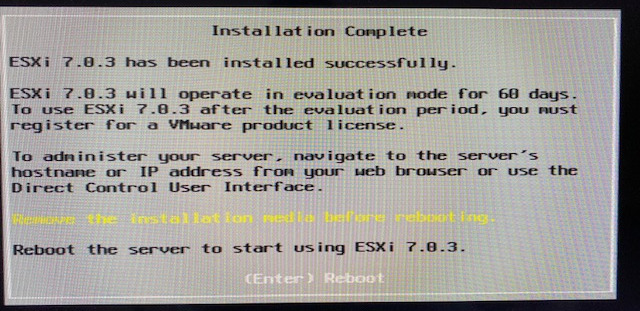
Once installation is complete, remove the USB drive then press enter to reboot the server.
Locate the management address
After the server reboots, all management is done in a web browser through a computer on the same network. Video output from the server indicates which address it has been assigned:
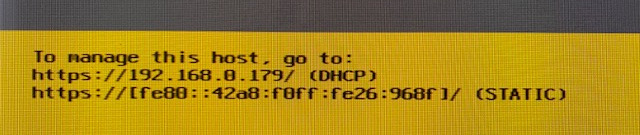
It’s a good idea to create a DHCP reservation to ensure a static IP. Doing so will allow for easy access later, or you could even create DNS records.
Log in
Type the server’s IP address into your web browser of choice to visit the management portal:
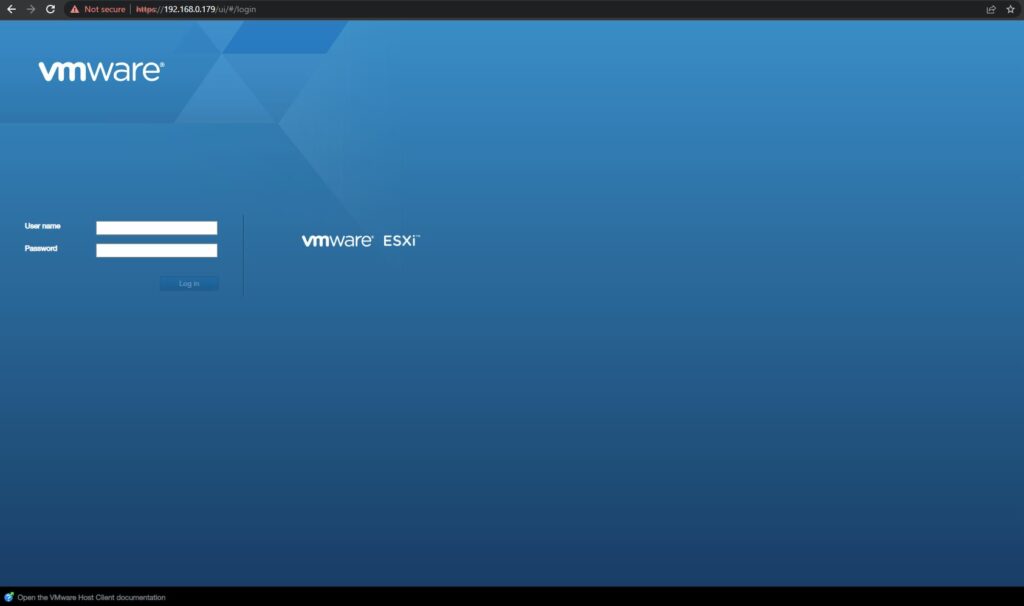
Use the root credentials you configured during installation to login. Once you’re in, you are presented with the management panel:
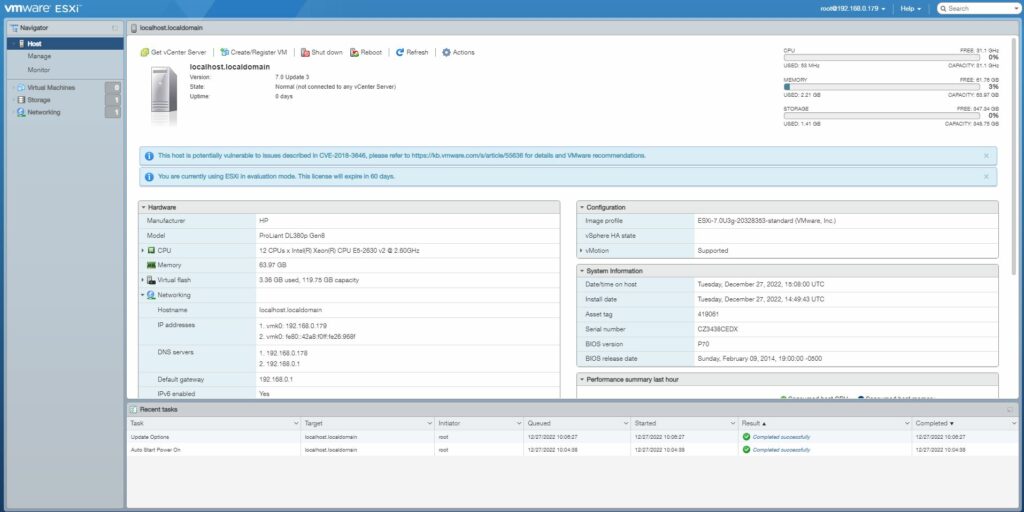
That’s it! From this page, you can take full advantage of the ESXi platform.
Next steps
There are a few things I recommend doing next:
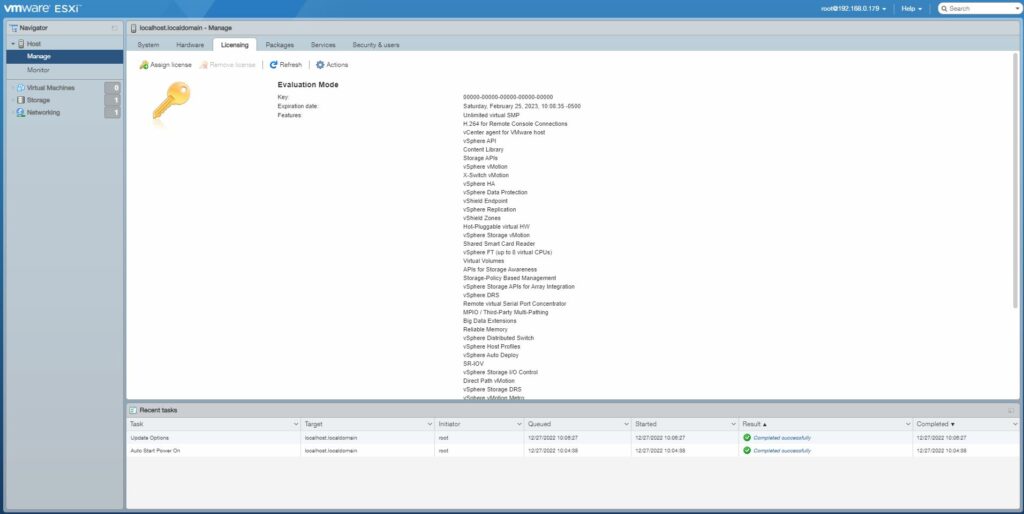
- If you have a license to apply, it can be added by selecting Host > Manage from the Navigator panel on the left, then selecting the Licensing tab in the middle pane.
- Additional users can be configured by selecting Host > Manage from the Navigator panel on the left, then selecting the Security & users tab in the middle pane. Finally, select the Users option from the menu on the left side of the middle pane.

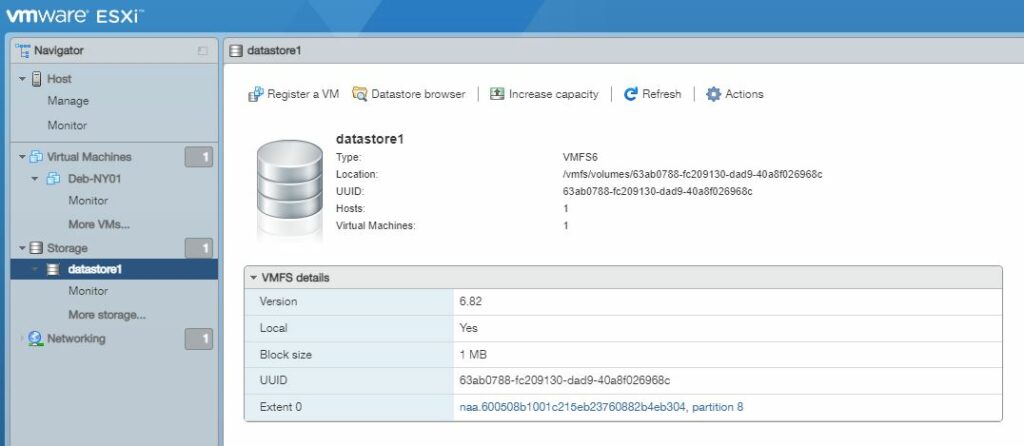
- You can upload OS images to the preconfigured datastore by selecting the datastore from the Storage menu in the Navigator panel, then selecting Datastore Browser and Upload.